Here I will start presenting the first part of our project with ARDUINO, made together with Alex Sanfeliu
We will first start with the materials used for the first things done:
Now before starting programming, we will need to download some stuff to our computer:
Now we can start working with Arduino IDE
First we should test if everything is alright, and we can do this with one of the blinking examples given in Arduino. If everything it's setup well, our LED should blink in differents periods wich we can control
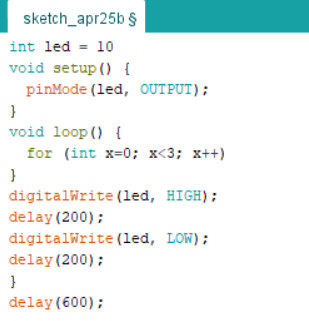
Now we will try to do the morse code, the main command we used in Arduino it's this one:

Here I made a video showing how this command is running:
Anyways, there are other ways to run this as maybe the last one doesn't work for you, so here are other tested SOS codes for Arduino: